Materials I used:
Base coat - Seche Vite
Polishes - China Glaze 'Don't Honk Your Thorn' (tan), 'Towel Boy Toy' (blue), 'Community' (brown), 'Release' (grey), 'Beach Cruise-r' (pink), and 'Boundary of Memory' (glitter)
Mani mask - Ellagee 'Lickity Split Latex Mani Mask'
Top coat - Rica 'Glossy Glam'
Makeup sponge
Small brush
Small dotting tool
I created a gradient for my background on all fingers except my pinky but I used a slightly modified method to speed up the process. Typically, when creating a gradient you either want to use a white or light colored polish to sponge over. This allows the gradient colors to be more vibrant and takes fewer sponged coats. However, using a white or one shade of color may not be ideal in all situations. For instance, the blue that I used was a bit jelly like and if I applied the tan on my entire nail it would have changed the color slightly, also the blue was to dark to put under the tan, and quite frankly I didn't want to bother with white undies. So here is what I actually did...
I applied my mani mask around my nails to protect my skin and speed up the clean up process. I then painted the upper half of my nail with the tan polish and the lower (free-end) portion of my nail with the blue. I allowed the colors to overlap slightly and wasn't to concerned with perfection at this point. It is important that no matter what color undie you use that you let it dry before sponging the gradient. If you sponge on wet polish, you will remove the base polish and end up with bare spots. After giving my two-tone base a few minutes to set, I then used a makeup sponge and applied my sponge gradient, blending the line between the colors. I have not tried this method with three colors, just with two. This method is great for colors that are a bit sheer or if you don't want to sponge many layers to get a heavy opacity. It took me two sponge applications to achieve the blend and opacity that I was looking for. On an average when I create a gradient, I typically do 3-5 sponge applications over white or light base.
I then removed my mani mask, did a quick clean up and applied a layer of top coat. I also applied a glitter to my pinky this time just to change it up a bit. I'm really beginning to like pinky bling.
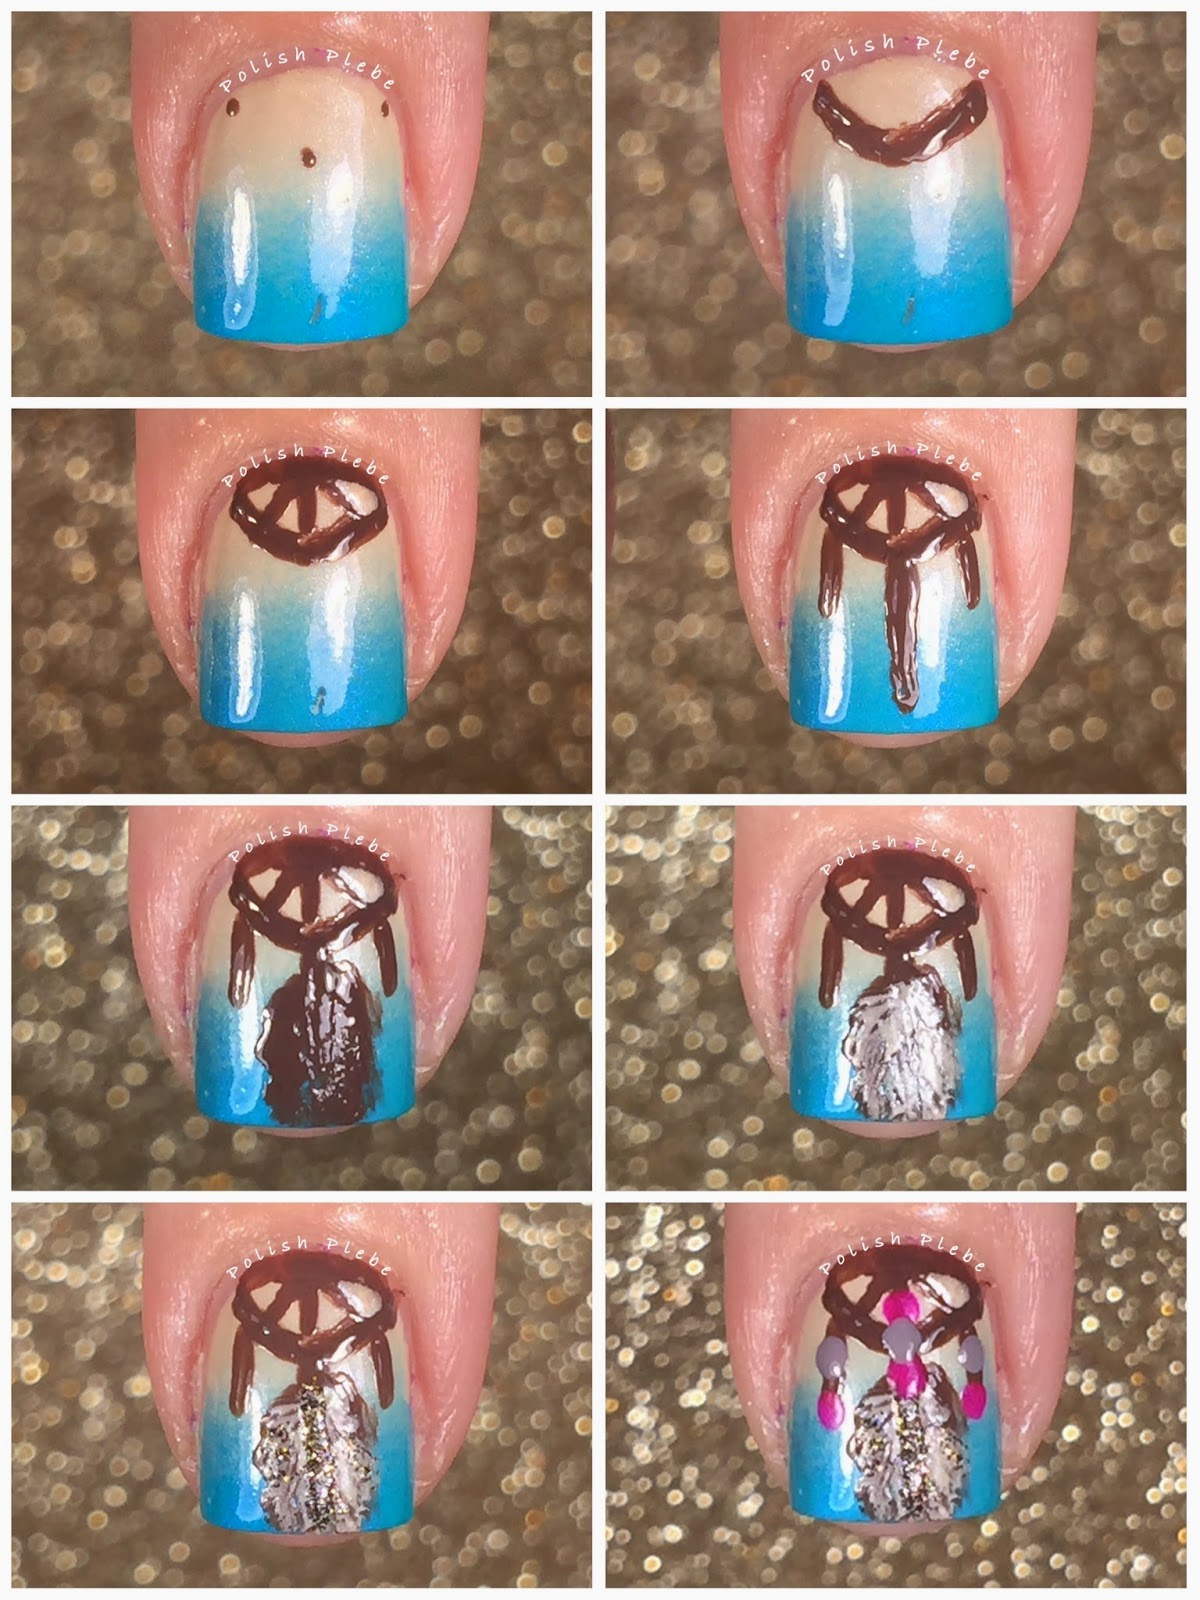
I then hand painted a dream catcher on my ring finger. Using a small brush, I started off by dotting three dots in a half circle at my cuticle to use as a guide. I drew the half circle, spokes, and three strands hang from the catcher with my brown polish. On the center strand I drew the outline of a feather with the same brown polish. I roughly filled in the feather with tan polish and then highlighted it with some of my glitter polish. I finished up the design by dotting some brightly colored beads with a small dotting tool.
On my three remaining fingers I painted a single feather in the same manner that I did with the feather on the dream catcher. The only difference is that I curved the feathers slightly.
I've always liked hand painted feathers in the nail art designs I've seen and other artists make them look so easy, but sadly these didn't come out exactly the way I had hoped. Perhaps, if I try them with acrylic paints versus the polish I will get better results. I really like the gradient though, the gradient colors I used are two of my favorite CG polishes of all times. I hope you found the gradient tip useful, thanks for stopping by, see you next time.
Your Fellow Plebe,


