"On Holiday" Challenge

This months Lacquer Legion Challenge is "On Holiday".  My family and I recently just got from our holiday, we went to Atlanta.  While we were there we visited the aquarium.  It was my daughter's first time to an aquarium and she loved it!  She was excited by each exhibit and learned so many new words (she's 16 months old).  So for the "On Holiday" Challenge I decided to do an underwater theme in honor of my daughters favorite part of our first family vacation.

I started with two coats of a white base color.
I then sponged three shades of blue on my nail and created the "floor" of the ocean by painting the tip with a light tan.  Because I wanted it to look like sand I intentionally painted it wavy.
To give the impression that this was underwater I used a shimmery irridescent top coat and a striping brush to create little water ripples.
With the background set I used acrylic paints to paint a variety of underwater creatures and features.  This is my first time using acryclic paints for nailart.  I had a good time with the paints but I discovered it is best to use water to thin the paints some.  Using paints that are thick create lumps and bumps and makes a smooth finish difficult to accomplish.  On my pointer I drew jelly fish, a crab on my middle finger, a school of fish on my ring finger, a seahorse on my pinky, and for my thumb I drew a treasure chest that I added some gold studs to.
I really enjoyed this months ##LLonholiday challenge and I can't wait to see what next months challenge is!  See you next time.

Your Fellow Plebe,

OPI's Coca-Cola Collection Swatches and Review

I am a big fan of Coca‐Cola.  Between there refreshing beverages and their pop culture, they have become an icon all around the world.  I was so excited when OPI announced that they were pairing up with Coca‐Cola to create a unique collection.  I couldn't wait to get my hands on them.  However, I delayed purchasing this collection because I was going away on holiday.

As a consolation prize I visited The World of Coca‐Cola while I was on vacation.  If you are ever in Atlanta, Georgia you have to stop in.  The World of Coca‐Cola is a fantastic museum that catalogs the birth, expansion, and current standing of Coca-Cola.  I was hoping to find OPI's collection in the gift shop but unfortunately I wasn't lucky enough to find it there.  So, as soon as I got home I ran to my local beauty supply store and purchased this collection.
Each color in this fun collection  represents a different Coca-Cola flavor.  For all the swatches below I applied two coats.  The coverage of the formulas in this collection was excellent even with the lighter shades.  Some of the darker shades really didn't require two coats but I applied two for consistency.

This color represents traditional Coke which is apparent by the name alone.  I personally do not own many red shades, in fact, this is only the second real red shade I have ever purchased. However, this color is really attractive.  Sadly, the color is a little thin, you can see in the pictures a dark spot on my mid‐finger.  This is a
bruise I acquired when I slammed my finger in a car door about a week ago.  Either way this is still a very refreshing red.

This color was inspired by Vanilla Coke.  I have to say that I can see myself using this color often in the future.  This is a beautiful cream color that is very much vanilla.

This color represents Cherry Coke.  This color is a very rich royal purple.  The formula on this color was so good and could have easily been applied in one coat.

This color represents Diet Coke.  This color is absolutely gorgeous!  I love, love, love this polish!  It is a beautiful shimmery chrome silver that is just so eye catching.  This is another color that I see myself using a lot.  The formula on this one was also fantastic and can easily be done in one coat.  Everything about this polish is awesome!

This color was inspired by Coke Zero.  This is a very interesting glitter polish that has a smoky black jelly base with red glitter specks.  With two coats it takes on an almost dark brown appearance.  This color perfectly represents Coke Zero, it almost looks like Coca‐Cola was poured on your nails.

This shade represents Sprite.  This is another absolutely gorgeous shade.  This holographic green has beautiful metallic green with purple and gold tones in it.  This color has so much character to it, it is really hard to show how great it is in the photographs.

This shade was inspired by Fanta Grape soda.  This is a perfect representation of a grape shade.  I'm not overly fond of purple but this color is very wearable shade.

This color represents Fanta Orange.  How about this polish?!  This is such a fun glitter polish.  The metallic  silver, yellow, and orange shades are perfectly set in a orangey-yellow jelly base.  This polish is just too much fun!

This is another shade that was also inspired by Vanilla Coke.  I have to say that this is probably my least favorite color in the collection and doesn't at all remind me of Vanilla Coke.  I felt like they just stuck a pink shade in the collection just because they were missing out on a pink shade.  However, it is still a decent shade of a corally pink and the formula was really good as well.

All in all this is a fun collection that I think represents Coca‐Cola well and vice versa.  So, if you are looking for a slightly healthier way to enjoy a Coke product this is a good way to do it.  So, the question is what's your favorite Coke product and do you like it's coinciding nail color just as much?
Coca-Cola Red is a dead match for the Coca-Cola labeling.
I hope you enjoyed these swatches and found this review useful.  See you all next time.

Your Fellow Plebe,

Water-Marbling Technique

I'm sorry I haven't been posting frequently the last few weeks but we were away on holiday and then had relatives staying with us so life has been fairly abnormal but things are finally getting back on track.  This "What R U Wearing Wednesday?" I decided to do a water‐marbled mani.  Some might also refer to this as the water‐swirling technique.  I have had some requests to do a tutorial on this technique and though I have not mastered it yet I do have some tips that will hopefully make your water-marbling easier.
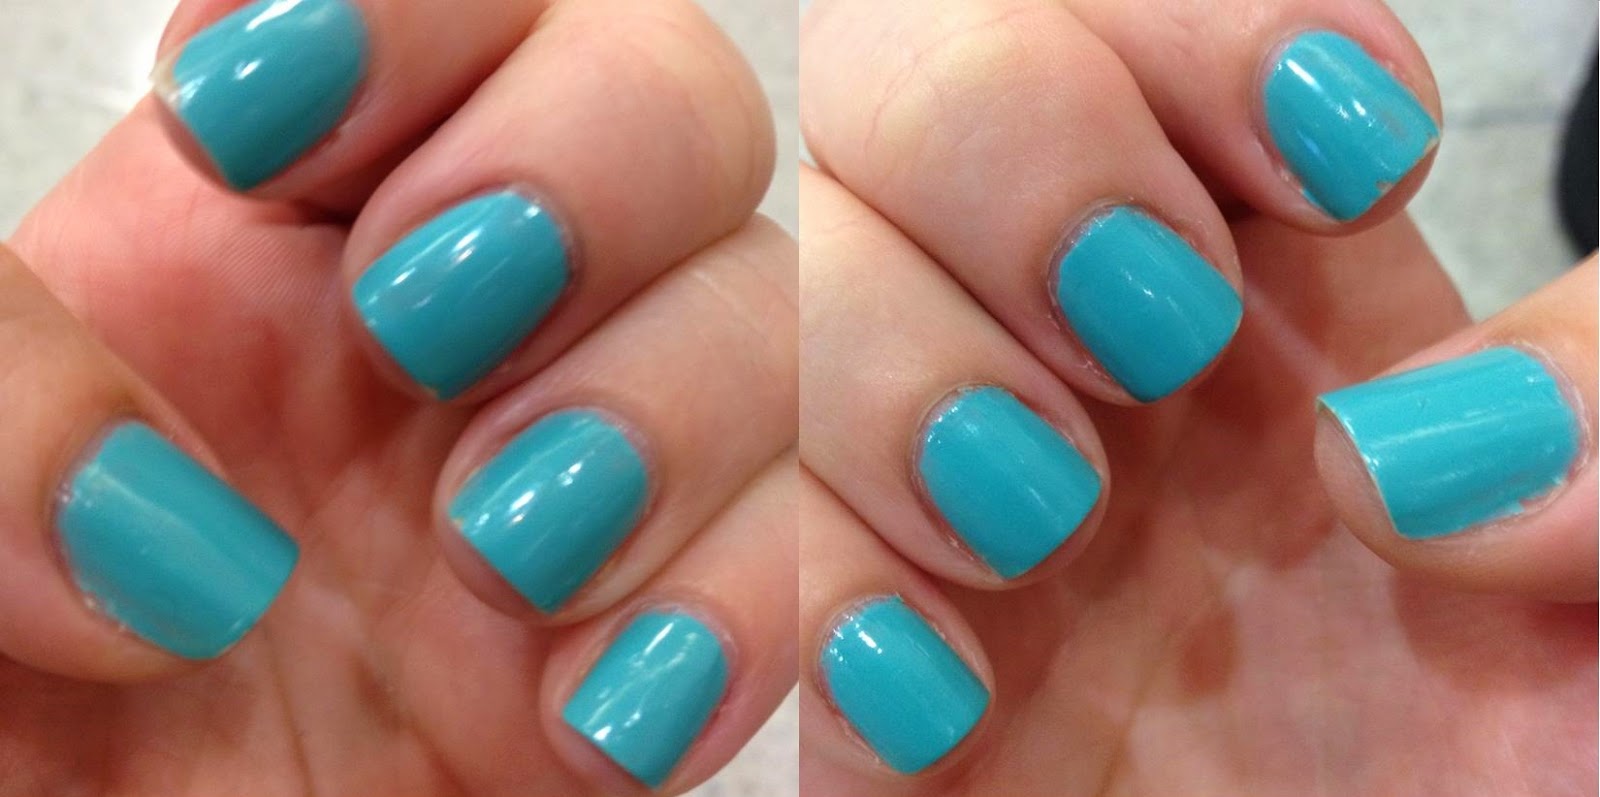
I used Zoya Tilda, Rooney, and Ling for this water-marble manicure.
I'd like to start with a brief history of my experience with this technique.  Water‐marbling was the first complex nail art technique that I tried.  It is also all the beautiful water‐marbled manicures that I have seen on the internet, and all the You Tube videos that I watched that made it look so easy that intially attracted me to nailart design.  The first time I tried this technique I was at my best friends house with her sister and daughter.  We spent the entire evening trying this technique on our fingers.  It turned out to be a long and frustrating evening but in the end we all had our fingers done.  Since then I have done this technique quite a few times, some were successful and some were epic failures.

With that being said, I'll now say this…water‐marbling is not easy.  If you have never done this type of nail art don't expect to get it right on your first try.  Not to say that you might not get lucky.  I'll begin by explaining  the technique and then discussing some of the issues you could run into and how you might avoid or fix them.


Materials
Base coat and top
Colors of your choice
Dish, cup, bowl
Water
Toothpick
Q‐tips
Scotch tape


Technique
Prep your nails by applying your favorite base coat and then applying a base color.  Wrap your finger in scotch tape or use the glue method to protect the cuticle and skin around the nail.  This step is not necessary but is wise because it protects your skin and limits the amount of clean up you have to do.

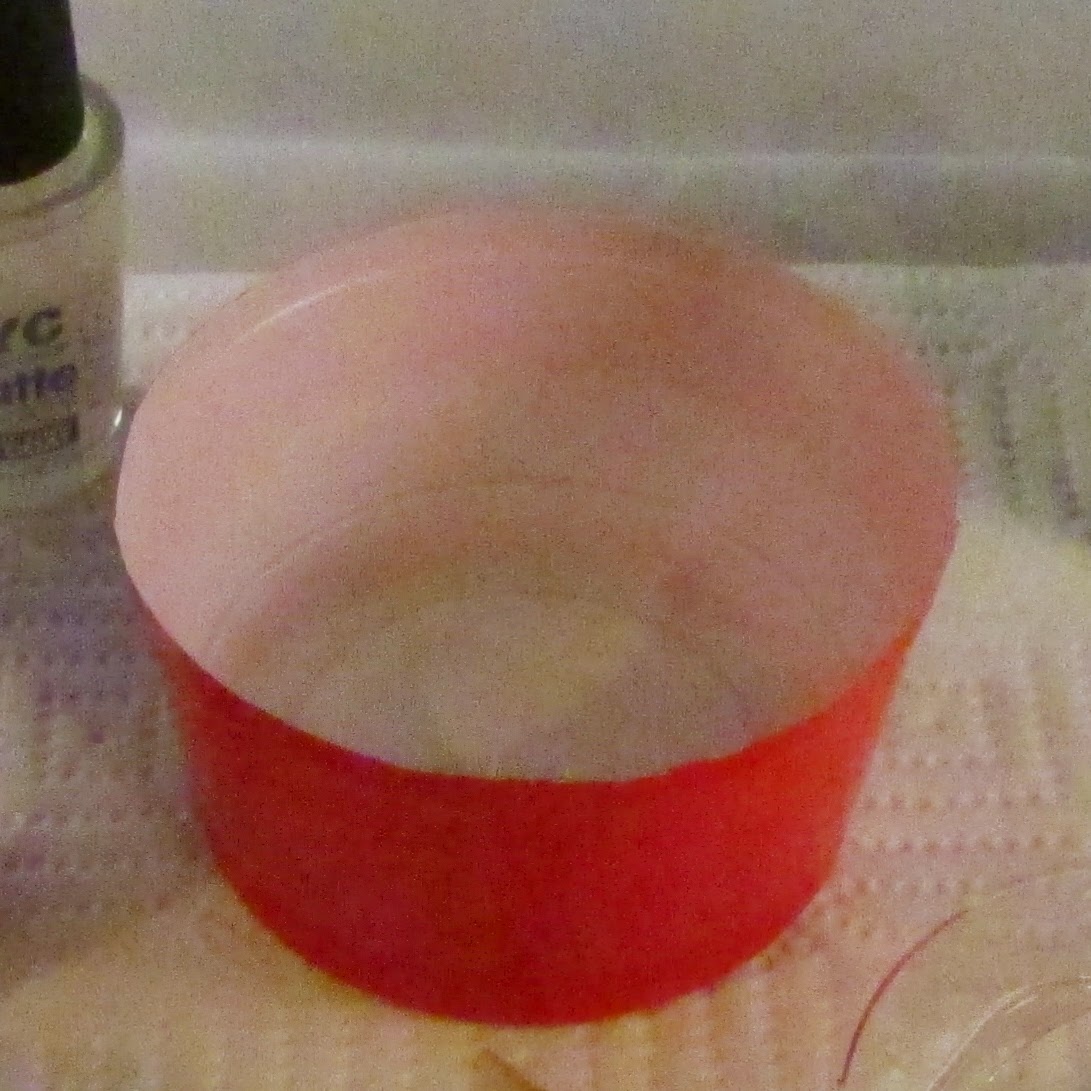
Fill a small dish with water (preferably distilled water, more on this later).  Take each of your polishes and take turns dropping each in the water.  This will create a bullseye if done properly and will widened with each drop.
After your satisfied with your bullseye use a toothpick to pull the polish along the water and create a swirl pattern.
Choose an area that you like the most and submerge your finger in that area with your nail down. While your finger is still submerged use a Q‐tip or toothpick to pull the excess polish of the surface of the water.
Once the surface is clear of polish remove your finger from the water.  Remove your tape or glue, clean up your cuticle, and apply your favorite top coat.

Tips, Tricks, and Advice
Sounds easy right?  What could possibly go wrong?  Well if you read what I wrote in the beginning of this post, you can probably guess a lot can go wrong.  Well here is a list of problems and things I recommend doing to avoid having a horrible water‐marbling experience.
The first problem that I had was that I had a hard time creating a bullseye.  After reviewing several videos and other tutorials as well as doing a great deal of trial and error I discovered that the water needs to be pure and room temperature.  Many people do not have a problem using tap water, however, I discovered my tap water has too many minerals and deposits in it to use for this technique.  Room temperature also seems to be best because if the water is too cold the bullseye will not spread.  It is also wise to change your water in the middle of a project to keep it clean.  I like to use bottled water because it works best for me and I can leave the bottle out to keep it at room temperature.

Another problem I was having, in creating my bullseye was because of the polish itself.  Not all polishes are made exactly the same and some can be heavier and denser based on the pigmentation and additives in them such as glitter.  I have tried water‐marbling with metallic and shimmery polishes and they don't work as well as cream polishes.  I found that newer polishes, and thinner polishes drip the best but depending on the formula of the polish may not spread to create a good bullseye.  The only advice I can give for this is to test your polishes before you commit your nails to the project.  Also, the brand doesn't matter.  Just because one color of a certain brand works well doesn't mean other colors in the same brand will work too.  Mixing brands is also okay.

If you have a polish that works okay but isn't spreading as much as you'd like there are a couple methods you can use to help make the bullseye larger.  One method is to tap the side of you dish lightly.  Another method is to take a toothpick and slowly pull the water in a circular motion on the outside of your bullseye.  Creating movement in the water with either method helps loosen the polish so that it spreads.
There is not right or wrong way to swirl your water‐marbling design but a few pointers for this would be to work either from the center out, or from the outer ring in toward the center.  If you choose to pull from the outer ring to the center do not pull from all the way outside of the bullseye.  If you do it will move the entire bullseye and most likely it will end up ruined.  Start your pull from the second or third ring from the outside to create the pattern you'd like.  I would recommend you don't over‐work the pattern you are trying to create.  If you would like to create specific patterns like stripes or flower I would suggest watching some You Tube videos to see how other pull these patterns.
Another issue I had on occasion is the polish would bead and drop straight to the bottom of the container I was using.  I discovered this had to do with the weight of the polish and how far above the surface of the water I was holding the brush.  I was holding the brush too high and when the polish hit the surface of the water it broke through instead of settling on top.  So when testing your polish I would also recommend paying attention to the height you hold your applicator at.  Also you don't want to touch the brush to the surface of the water because it may ruin your bullseye.

In regards to the container that you use, it doesn't really matter what it is or what size it is.  Keep in mind though that the size should be larger enough to stick one or two fingers in at a time (I really wouldn't recommend doing this with more than one or two fingers at a time unless you have mastered this technique).  I personally like to use a disposable plastic cup cut down so that it is easy to use and I don't have to use a lot of water.
Make sure that when you place your finger in to catch your design that you do not pull it out before you have cleaned the excess polish off the surface of the water.  I can't tell you how many times I have ruined a good water‐marble pattern because I was impatient and didn't take my time.

Occasionally, you may end up with a bubble or bare spot in your water‐marble design.  Unfortunately, this is unavoidable.  However, you should use a white or light colored base coat of polish under your water‐marble so that this doesn't become an eye sore.  With the water‐marble design I did for this post I didn't use either a white or a light color because I didn't want the white to be seen and I thought using any of the polish I was using would affect the other colors too greatly.  I ended up applying a matte top coat directly over a base coat to give the polish something a bit easier to stick to.  I really wish I had used the pink shade as my base color though because if you look closely you can see some bare spots.

If you use tape to protect you skin and cuticle areas cut the under side of the tape before pealing it off gently.  Too many times did I impatiently try to pull off the tape without cutting the under side and ruined my design.
Another bit of advice I can provide is that you need to work somewhat quickly so it is best to set up all your tools within easy reach, prep your nails in advance of creating your bullseye, have all your polishes open and ready for dropping, and try not to work too hastily.

All in all this is a beautiful nail art technique that requires patients, practice, a little  bit of research, some preparation, and time.  I would love to see any of your water‐marbling designs and if you have any questions ask away, I'll answer them to the best of my abilities.  Also don't forget to share your "What R U Wearing Wednesday" manicure either on Instagram with #whatruwearingwed or on my Facebook page.  Thank you for reading my post, see you next time.

Your Fellow Plebe,


Essie's Study

Essie Weingarten set out for Las Vegas in 1981 where she revealed her first 12 nail polishes colors. A year later her polishes were so popular that she began shipping internationally. Essie has continued to grow and expand offering not only beautiful colored polishes but a variety of top coats and nail treatment products. The brand has become very popular in the celebrity  realm as well. It is said that Queen Elizabeth II is very fond of Essie's Ballet Slippers. In 2010 Essie Cosmetics, LTD was sold to L'Oreal. (http://en.wikipedia.org/wiki/Essie_Weingarten)

Of all  the shades Essie's has available and of those I own I decided to do this week long study using Where's My Chauffeur. I choose this color for two reasons of which both are closely related. The first is that I absolutely adore this beautiful soft turquoise shade and the second is that this is one of the only two polishes that I brought with me when I went on Holiday.  I did not purchase this polish, but had won it in a Beauty Supply Plus giveaway a month or so ago.

I decided to start this study in the middle of my vacation because if I started it at the beginning of  vacation it would be very difficult for me to keep it on once it began chipping. I also wanted to make sure that I would still have it on when I got home and back to regular chores so that the polish was exposed to similar hardships as the previous ones that I have already study.
Price Range - $3 - $25
Average Price - $6 - $8
(Moderately Priced)

Initial Impressions
Essie's has upwards of 200 colors to choose from and depending on where you purchase it from the prices can vary greatly for the same shade of polish.  I started purchasing Essie when I found a beauty supply store that offered them at a far more reasonable price than department stores (i.e. Target).  The experience I have had with Essie has been both good and bad.  However, I really like there colors and they are quite popular so I wanted to do this "study" on their polish.

Initial Impressions
Packaging
Simple, not a lot of draw
2
Uniqueness
The square bottle is an Essie signature.  When you see this bottle you know without even looking at the labeling that it is Essie.
3
Storing
The square bottle makes it easy to store tightly in draws or on shelves or pretty much anywhere.
3
Labeling
Most of the pertinent information is folded on a small tag on the underside of the bottle.  I don't like this because they can tear off easily.
1

Total
9/12

Application
The application of this went relatively smooth, the first coat was  very thin and kind of streaky.  However, the second coat went on much smoother.  This seems to me to be very typical of Essie polishes that I have dealt with.  I did have a bit of a thin spot  on one finger but I assume this is because I applied the second coat a little too soon after the first coat.

Application
Applicator Handle
Typical design that makes it easy to hold and maneuver.
3
Applicator Brush
A little firmer than I prefer.
2
Polish Thickness
A bit thin for my liking.
2
Number of Coats
2 coats to achieve desired appearance.
3
Drying Time
Dry to the touch in less than 5 minutes.  Completely dry in 15 minutes.
3
Similarity to Color in the Bottle
Identical.
3

Total
16/18

Day to Day
I applied this on Tuesday midday while my little one was napping.  We were on holiday so I had to use a desk in the room as my work space.  I apologize in advance for some of the randomness with the pictures backgrounds and lighting because they were taken in different areas with different lighting because of our travels.

Day 1 - Because we were holiday there were no chores involved.  However, within the first 24 hours I did get a little chip on one finger on my left hand (my non-dominant hand).  We had spent most of the day at an indoor playground for my daughter.  Chasing a little person and keeping them from damaging themselves can be tough on ones hands : )

Day 2 - Consisted of sight seeing and swimming.

Day 3 - It was time to head home so we started with a flight between Augusta, GA and Charlotte, NC.  After a long delay for a flight to NY it was cancelled due to weather : (.  We ended up pulling an all nighter and driving from Charlotte to our home in NY.  

In addition to the disappointment of how or traveling plans were turning out I was also disappointed as to how my polish was holding up.  I had anticipated the dryness that traveling causes my hands and nails so I kept a small bottle of lotion and a cuticle oil pen on me and frequently moisturized my hands.  This should help keep the nails more flexible to keep the nails from breaking and the polish from chipping.  However, this was not the case by the end of the day the polish was significantly chipped and there was far more crazing than was previously noticeable.

Day 4 - Finally, back home!  I did absolutely nothing but veg, I was so exhausted from the trip.

Day 5 - Time to get things back in order. I spent the majority of this day unpacking and doing laundry.

Day 6 - I spent this day getting back into my daily grind.  I went to the gym to work out, ran some errands, and went grocery shopping.  How exciting : P

Day 7 - This was a bit of a normal day for me.  In addition to normal chores, I scrubbed my floors, took my daughter to tumbling class, did yard work, and ended the evening with baby bath time.
Here is the daily score for this Essie polish...

Daily Scores
Day 18
Day 29
Day 36
Day 48
Day 56
Day 65
Day 75
Total47/70

I really like the colors that Essie has to offer.  Their colors are elegant and beautiful.  Through this study I had moments of disappointment but overall the wear of this polish was pretty good.  This is only the third polish that I have performed this study with.  Essie scored a 72 out of 100 which gives it a B- based on my scoring methods.  For the pricing of this polish this is pretty much what I have come to expect for wear.


Please let me know if you like these studies, if you find them useful or not.  If not I'll probably give up doing these studies.  They are very difficult for me to do because it requires me to wear the same polish for a whole week.  For someone with a severe polish addiction that is a significant challenge.  I'm sure some of you know what I mean.

Thank you for taking a look at this post.  Please stay tuned, I promise I will be posting some pretty stuff soon.  I'll see you all next time.

Your Fellow Plebe,

What are You Wearing Wednesday?

It is time once again for What are You Wearing Wednesday?  A time for show and tell.  This is my first blog post since I have back from holiday.  I am sorry I am posting it so late in the day but it has been a very trying day of unsuccessful nail art endeavors.  So after five failed attempts, I closed my eyes and grabbed the first polish my hand touched out of my big box of polish and this is what I ended up with.


Essie's Fashion Playground.  I love this soft mint shade so I was very excited to see it was what I had blindly picked.  I originally swatched and reviewed this back in March with the rest of the Hide & Go Chic Collection (If you missed it check it out here http://ilovemanicures.blogspot.com/2014/03/essies-hide-go-chic-swatches-and-reviews.html).

I decided to dress it up this mani with some random shaped and sized silver and gold studs that I recently purchased at bornprettystore.com.  This is what I came up with...


I really like the silver and gold together, I think it creates an elegant touch that is eye catching yet not overwhelming.  I also really like this cute silver star spiral ring I purchased from bornprettystore.com.  The studs are Item #7277 and the ring is Item #10506.  Check out the store and use my 10% off coupon code: CREATEX31 on your next purchase.

If you'd like to share What you are wearing this Wednesday head over to my Facebook page or #whatruwearingwed on Instagram.  While you're there like and follow me, you can also keep up with my blog through Google+Bloglovin, and/or Pinterest.  See you all next time.

Your Fellow Plebe,

Anchors Away!

The finger nail fashion trend for this summer is very nautical in nature.  Anchors are at the top of the list of nautical inspired manicures lately.  So, I tried my hand at painting my own anchors to see if it was difficult or not.  I also tried a slightly different method for creating stripes too.

Materials
Top and base coat
White polish
Medium blue polish
Yellow Polish
Yellow glitter (optional)
Floss pick

After applying my base coat I applied two coats of OPI's Alpine Snow on my pointer and mid finger, two coats of Nabi's Lime Light on my thumb and ring finger, and one coat of Nabi's Blue on my pinky.


On my thumb and ring fingers I decided to add a little extra flare so I added Nabi's Yellowette.


I then drew anchors on my thumb and ring fingers.  Using a thin brush and my blue color polish I drew a straight line (the center of the anchor).  I then drew the anchor arms, by drawing a simple slightly curved line on either side of my line.  I then drew little  triangles on the end of the curves.  Lastly, I used a dotting tool to make a dot at the top of the anchor.


On my white fingers I wanted to draw lines but I didn't want them to be perfect.  I used a floss pick and painted blue polish on it.  I then created my imperfect lines by rocking the floss from one side of my nail to the other.  If you decide to create  these lines you may have to reload the floss with polish after a couple stripes.  If you don't apply enough polish or it dries out the lines will be very thin and the under color may show through.  If you overload the floss you'll end up with thick blobby lines.  You may find it best to apply thin lines and go over them a few times till you reach your desired opacity.


Perform a bit of cleanup around the cuticles and apply a top coat and there you have another variation on an anchored manicure.  Are you onboard with anchors or do you feel that anchors are over done?


  I think the nautical themes are fun and I'm glad I got to practice some of my freehand.  I also like the concept of using the flossing pick to create stripes but I think I need to practice this technique a bit more to get it a little cleaner.  I hope you enjoyed this post, and just as an FYI I will be traveling for the next couple of weeks so I will most likely not be posting anything on this blog for a bit.  However, I will still be up on Facebook and Instagram so follow me there for the latest polish plebe updates.  If you happen to recreate this mani share it on Instagram and #ilovemanicures or @polish_plebe in the comments.  Thanks for tuning in and I'll post as soon as I can when I get back.

Your Fellow Plebe,

Watermelon Nubbies

I think watermelon nail art designs are one of the cutest summer designs out there so I did my own interpretation on a watermelon nail art design for you.  So this "What are you wearing Wednesday?" is also a tutorial.

Materials
Top and base coat
Light green polish
Medium pink or light red polish
A green nail art striper (darker than your shade of green polish)
A white nail art striper
Black polish
Dotting tool (small to medium size)
Hole reinforcement stickers
Drying drops (optional)

Please excuse the nubbiness of my nails.  My yard work has been particularly tasking this last week and my poor nails did not fair well.

After applying a base coat, I applied my light green polish to my thumb and pinky.  I applied my medium pink polish to my pointer, mid, and ring fingers.  For this design I used colors from Zoya's Tickled collection, Tilda is the light green and Rooney is the medium pink.


After my pink polish was dry (I used drying drops to speed up the process) I applied the hole reinforcement stickers onto my nails.  I wanted the three fingers to appear as one slice of watermelon so I applied them so that the middle finger was mostly center and the pointer and ring fingers showed opposite edges (this will probably be more obvious in later pictures).


I then applied my light green polish above the stickers near the cuticle.


Working as quickly as possible I then drew dark green lines using a nail art striper to create the watermelon rind.


After removing the stickers I used a white nail art striper and lined the edge of the rind.  This helps give the design definition and hides any major imperfections.


I then used black polish and a dotting tool to create watermelon seeds.


To finish of the look I used the green nail art striper to create a watermelon rind appearance on my thumb and pinky fingers.  I intentionally made these lines wavy and irregular widths because frankly have you ever seen a watermelon with perfectly straight lines.


After a little clean up around the cuticles and applying a top coat to give it the extra shine this is what I ended up with...


I think this design is super cute and compliments my little stubbikins.  The colors are bright and vibrant perfect for summer.  This nail art design would be great to wear to a picnic or a bbq or for any reason at all really.  It is also a really easy design for beginners too because it doesn't have to be perfect to look good.  This watermelon design allows you to practice using different nail art tools like stripers and dotting tools without the stress of worrying about perfection.

I hope you enjoyed this tutorial/What are you wearing Wednesday? post.  If you would like to show off what your wearing today head over to my Facebook page and share it there or share it on Instagram #whatruwearingwed .  While your there like and/or follow me to keep up with my blog.  And if you re‐create my watermelon design share them on instagram with @polish_plebe in the comments or #ilovemanicures and I may share them.  Until next time.

Your Fellow Plebe,


Nails Art Proudly Powered by Blogger