Showing posts with label chevron. Show all posts

Art Deco Inspired Nails

Hello Lovelies!  I am in love with the Roaring 20's, the fashion, the lifestyle, the architecture, and the décor.  So when Nail Art Nation announce this week's prompt is the Roaring 20's I couldn't wait to get creating.  As a former interior designer I'm obsessed with anything Art Deco, so this nail art is a simple Art Deco inspired design...


Materials I used:
Basecoat - SuperChic Lacquer "Bring It On!"
Polishes - Sinful Colors "Snow Me White" & "Black on Black", Gothic Gala Lacquers "The Enterprise"
Iridescent topper - Color Club "Concrete Jungle"
Striping tape
Chevron vinyls from NailVinyls.com
Small rhinestones
Topcoat - SuperChic Lacquer "Marvel"

To create this look I began with one coat of white polish topped with an iridescent shimmer polish and a quick drying topcoat.  Now I know most people think of black and gold color schemes when they think of the 20's but I decided to change it up just a little bit.


With the base dry, I used striping tape to create a fair sized vertical stripe off center of the nail.  I filled in the tape with a soft metallic grey.  After removing the tapes I applied a quick drying topcoat, just over the stripe.  I did not apply quick drying topcoat over the entire nail in order to prevent the final finish from being too thick.

Once this layer was dry, I used two chevron vinyls.  By lining them up point to point I was able to create a diamond pattern.  I found that connecting the points with as little overlap as possible gave the best diamond shape, in fact the ones pictured below are overlapped a little too much.  I placed the diamonds roughly center of the nail, slightly overlapping the grey stripe.  I filled in the diamonds with black polish and removed the vinyls.  Lastly, using topcoat as an adhesive I applied a rhinestone between the diamonds.

As usual I finished off with a bit of cuticle cleanup using gentle acetone and a brush, and applied a final layer of quick drying topcoat.


I'm such a huge fan of the Roaring 20's that I even had my wedding reception in a replica speakeasy and I made all my guest dress period appropriate.  I have to say seeing my Grandmother dressed up like a flapper was the best wedding present ever!  So when I say I love the Roaring 20's I really do mean it.


If I have time this week I will most likely create another 20's inspired nail art design, because I have a least a billion more ideas of what I could create for this prompt.  I hope you like the 20's and enjoyed this nail art too.  Thanks for stopping by, see you next time.

Your Fellow Plebe,


ZigZag Nails Inspired by @lifeisnails

Hello Lovelies!  Today, I have a mani I created because I was inspired by the wonderfully talented Ramie of : +Lifeisnails.  I have been following her on Instagram, @lifeisnails, for a while and when she posted her Colorful Zigzag Nails a couple months back, I knew I had to try them.  I finally got around to creating my own version of her nail art, and this is what I came up with...


Materials I used:
Basecoat/polishes/matte topcoat - all from the Butter London "Gears & Gadgets" Steampunk Trunk, I purchased last year.  It is no longer available on their site.
Vinyls - TwinkledT "Frisky Chevron" (I purchased these a while ago, and I'm finally getting around to using them.)

I'll share with you how I created these nails but I would recommend you checkout Life is Nails on G+ or Instagram for a video tutorial (links to both accounts above), it will help tremendously though this is not a difficult nail art design.

Start out by painting three diagonal stripes in three different colors across the nail.  I wasn't concerned about them being perfect, but it is important that they are wide enough for a single vinyl to cover.  Apply a quick drying topcoat, and allowed to dry.  With the base colors dry, apply a vinyl over each stripe.  Proceed by painting a different color between each vinyl, be sure to remove the vinyls as quickly as possible to avoid pulls.


After a bit of cuticle clean up with gentle acetone and a brush, I applied a matte topcoat just to change it up a bit.


I love the design created by Ramie, and it was fun to recreate it though a little time consuming.  The only major differences, between hers and mine, is that I tried for a more Autumnal color scheme, used different vinyls (frisky chevrons vs. standard chevrons), and I applied a matte topcoat. 


All in all, I like Ramie's better but that is because she created them first.  Ramie, Life is Nails, is a major inspiration of mine, and I hope to be half as good as she is some day.


I hope you enjoyed my version of Life is Nail's Zigzag nails.  I'm curious about who inspires your nail art the most, is it fellow nail artist, a celebrity, a family member or friend?  Who's art do you look to when you find yourself in the need of a little encouragement? Please comment down below, I love to discover other nail artists and techniques.  Thanks for stopping by, see you next time.

Your Fellow Plebe,


Ikat Style Single Chevrons

Hello Lovelies!  I hope everyone is having a wonderful weekend so far!  I know I am, the weather has been better than forecasted, I got to bring my daughter to the circus yesterday, and I got this week's Freehand Challenge nail art done.  This week's Freehand Challenge prompt was Ikat.  For those of you that are unfamiliar with Ikat, it is a type of fabric printing that I believe is Indonesian.  It is often represented as a triangular or diamond shape pattern but can be many other patterns too.  I have done an Ikat nail art design once before so I wanted to try something a little different.  This time I went with an Ikat style single chevron print that was actually inspired by a cake I saw on Instagram created by @malihacreations, a custom cakery in Charlottesville, VA.  I inserted a picture of the cake into the picture with my nails below.
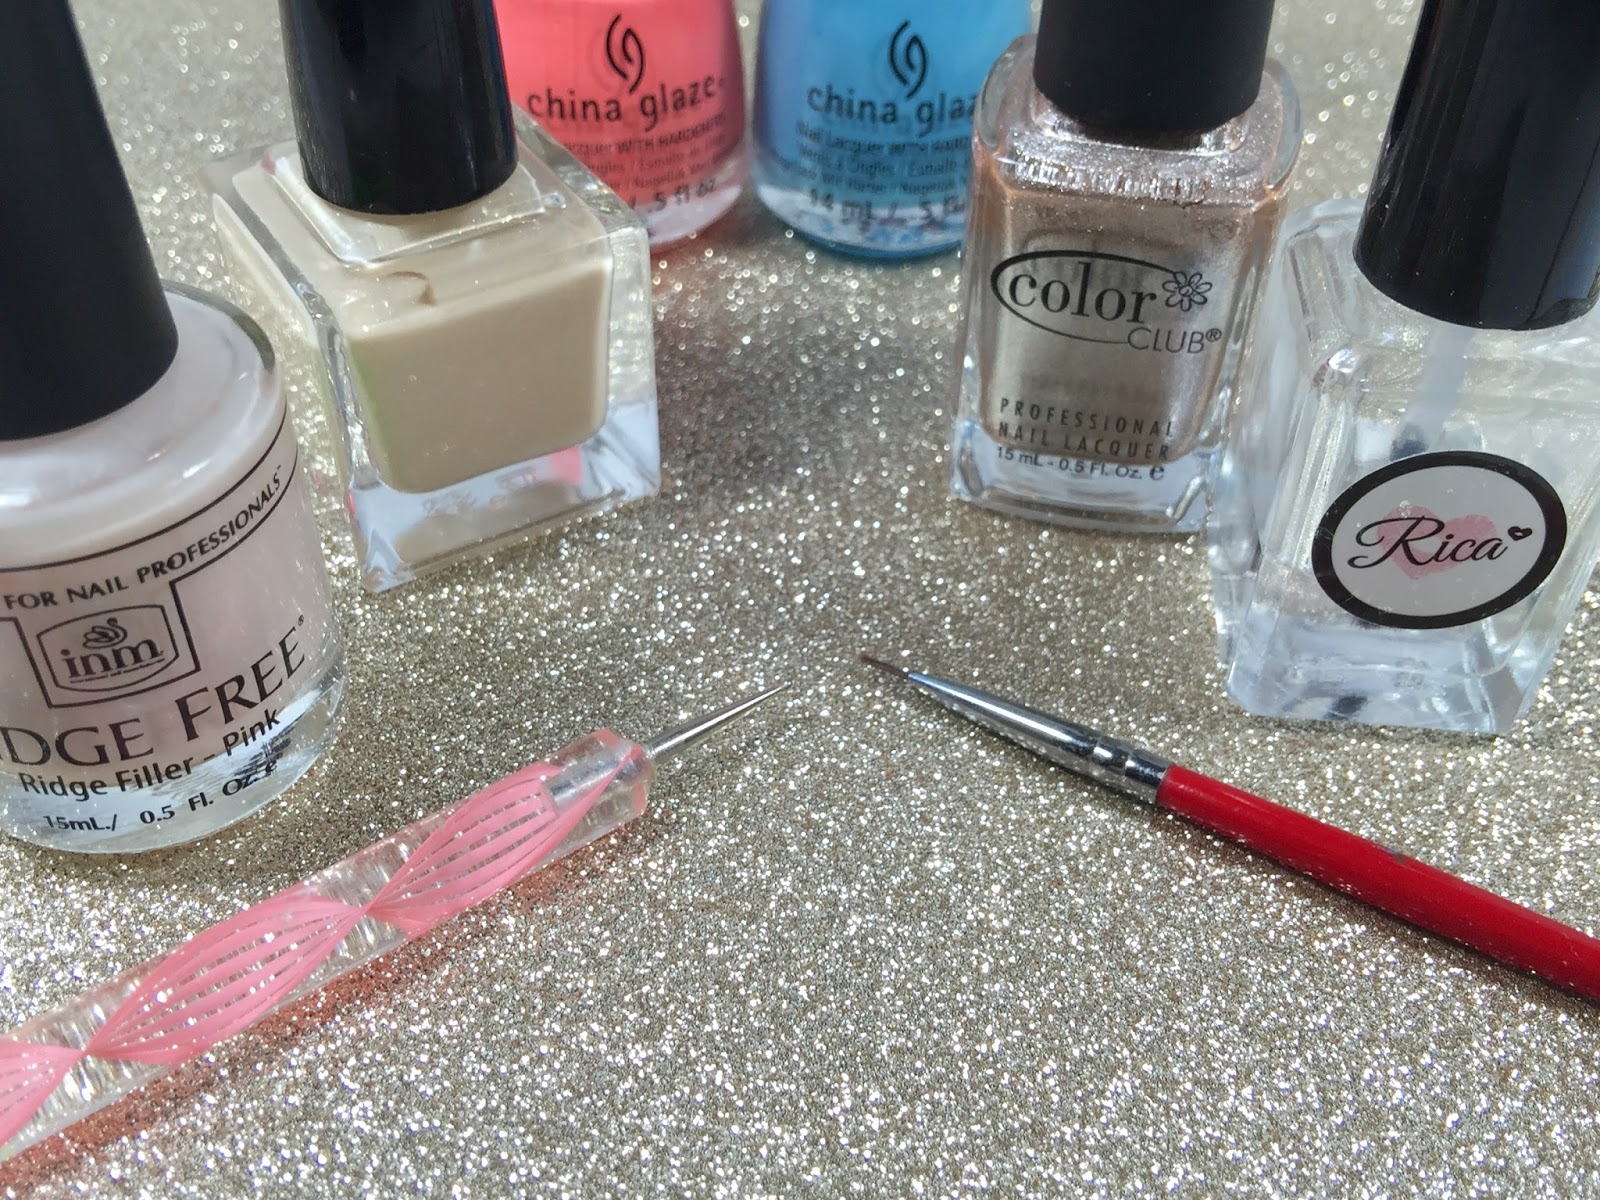

Materials I used in this design:
Base coat - INM Ridge Free
Base color - Lacquered Polish 'Irish Crème'
Stripe colors - Color Club 'Antiquated' (gold), China Glaze 'Petal to the Metal' (Pink), and 'Capacity to See Beyond' (blue)
Small detail brush
Small dotting tool
Top coat - Rica 'Glossy Glam'


For my base color I used a neutral shade of polish that actually has some gold shimmer to it, that is difficult to see in the pictures, but I promise it's there.  This was a polish created by Lacquered Polish as part of a collaboration set I purchased back in March.


I created the Ikat chevrons by placing three small dots in the shape of a V as guides for my stripes.  Then using a small detail brush, I created my first stripe (about two striping tapes width wide), using a hashing motion.  Essentially moving the brush up and down while creating the V-shaped stripe.  I created a second stripe with a secondary color about the same width using the same motion.  I then outlined both stripes with my third color.  Trying to make the outline stripes as thin as possible, I used a stippling or dotting technique with the same detail brushed used for the previous stripes.


As almost always, I performed a bit of clean up with acetone and a brush and then topped it all off with a glossy top coat.


As you can see I changed up the accent colors and the order of the color stripes a little bit.  I did keep the gold somewhere in the middle only because it just seemed right that way.  I did intend to flip the V's (points up near the cuticle) but I forgot I wanted to do this once I got started, *forehead slap*.


I really love how the bright pink and blue compliment the neutral background color.  The addition of the metallic gold also gives it a little pop, which is nice too.


I enjoy creating Ikat style nail art because you really can't do it wrong.  Ikat prints are a little messy, a bit uneven, and irregular.  That makes it a great design for beginners or someone with an unsteady hand.  I highly recommend you give this pattern a try if you haven't already.


I hope you enjoyed this nail art design and found the tutorial useful.  By the way, if you ever have any questions on this post or any other post please feel free to ask in the comments down below.  Thanks for stopping by, see you next time.


Your Fellow Plebe,


Split Chevron Nail Art Design

Hello Lovelies!  I am sorry I have been absent lately, but my 2015 is not turning out the greatest so far.  I am trying to get back on track and get some nail art designs finished for you.  I have many ideas I want to try but sadly not the time.  Oh, the woes of a nail art addict.  I did have a few minutes to do this design for you.


I created this look for the Nail Polish Queens' Weekly Challenge, neons.  I also wanted to take an opportunity to use some of my new polishes.  I chose these colors because I wanted to create something neon but also something subtle.

Materials
Base and top coat
Three shades of polish
Nail vinyls - L-shaped or 90 degree single chevrons, and straights (the nail vinyls I used are from nailvinyls.com)
Dotting tool - small to medium size

I started off with Sally Hansen Triple Shine 'Great White,' over a coat of Sinful Colors 'Snow Me White.'  I wanted the white shimmer and an opaque color, the white creme base coat allowed me to achieve the opacity that I wanted without a lot of layers.  I topped this all off with a quick drying top coat.


When my polish was completely dry I placed my 90 degree, single chevron vinyls.  My nails are not very long so I did about four sections, lining them up as evenly as I could.  I then placed one straight vinyl down the center, covering the points of each chevron.


Using a small brush and my two accent colors Sally Hansen Triple Shine 'Pool Side,' (blue) and 'Lemon Shark,' (yellow) I filled in the spaces. I alternated the colors, creating a staggered pattern.


Lastly I used a small/medium dotting tool and placed a dot in the v-shaped area near my cuticle line. Then I preformed a little clean up and applied a final top coat.


I created this full split chevron pattern on my ring and mid finger.  On all my other fingers I did a single split chevron stripe and dot.  I did this because I wanted the two fingers to be a full accent and because I didn't have a lot of time.


This is the first nail art design I've created this year, and I'm happy with the way it turned out.  It is both simple and slightly unique.  It kind of reminds me of a herringbone design, which is another pattern I intend to do for you in the future.  This pattern can be achieved in a few other ways, such as freehand or using stripping tape.  The method I shared (using chevron vinyls) just seemed to be the quickest to me.  I hope you like this design and enjoyed this post, thanks for stopping by, see you next time.


Your Fellow Plebe,


Nails Art Proudly Powered by Blogger