I was on the verge of ordering some vinyls when a thought crossed my mind…why not make my own? I do a lot of crafting and recalled having sheets of sticker labels somewhere. After digging around in the closet for a bit I found them! With my old labels found and my new Essie's Neon Collection sitting on the counter I couldn't resist creating a neon star manicure.


Materials
Base coat and top coat
White polish ‐ OPI Alpine Snow
All the polishes from the Essie's 2014 Neon Collection
Printable label, a computer with a paint program, and a printer
Scissors
Small brush
Using a paint program I drew up a variety of star shapes in different sizes. I first printed them out on plain paper to determine what sizes I would prefer. Once I got the sizes correct I printed them out on the sticker label paper.

Using a pair of scissors I cut out the star shapes leaving a tail on them. The tail needs to be long enough to hang off the nail when the shape is placed where you want it. You want it to be thin enough that you don't have to do to much fill in but thick enough it doesn't tear off when you pull it off the nail. I also recommend cutting all your pieces before you start painting your nails.

After applying a base coat I applied a coat of white polish to make the neon colors really pop.

I decided to leave my thumb and pinky solid so I went ahead and painted them with Chills & Thrills to get them out of the way.

On my pointer I did two coats of Vices Versa on the entire nail. On my middle finger I painted the top corner with Sittin Pretty and painted the bottom corner with Too Taboo. On my ring finger I painted three somewhat large dots of Serial Shopper, I'm Addicted, and Vices Versa. I wasn't concerned with clean lines at this stage but wanted to make sure that the colors would be large enough to cover the size of the vinyl with a little extra just to be sure.

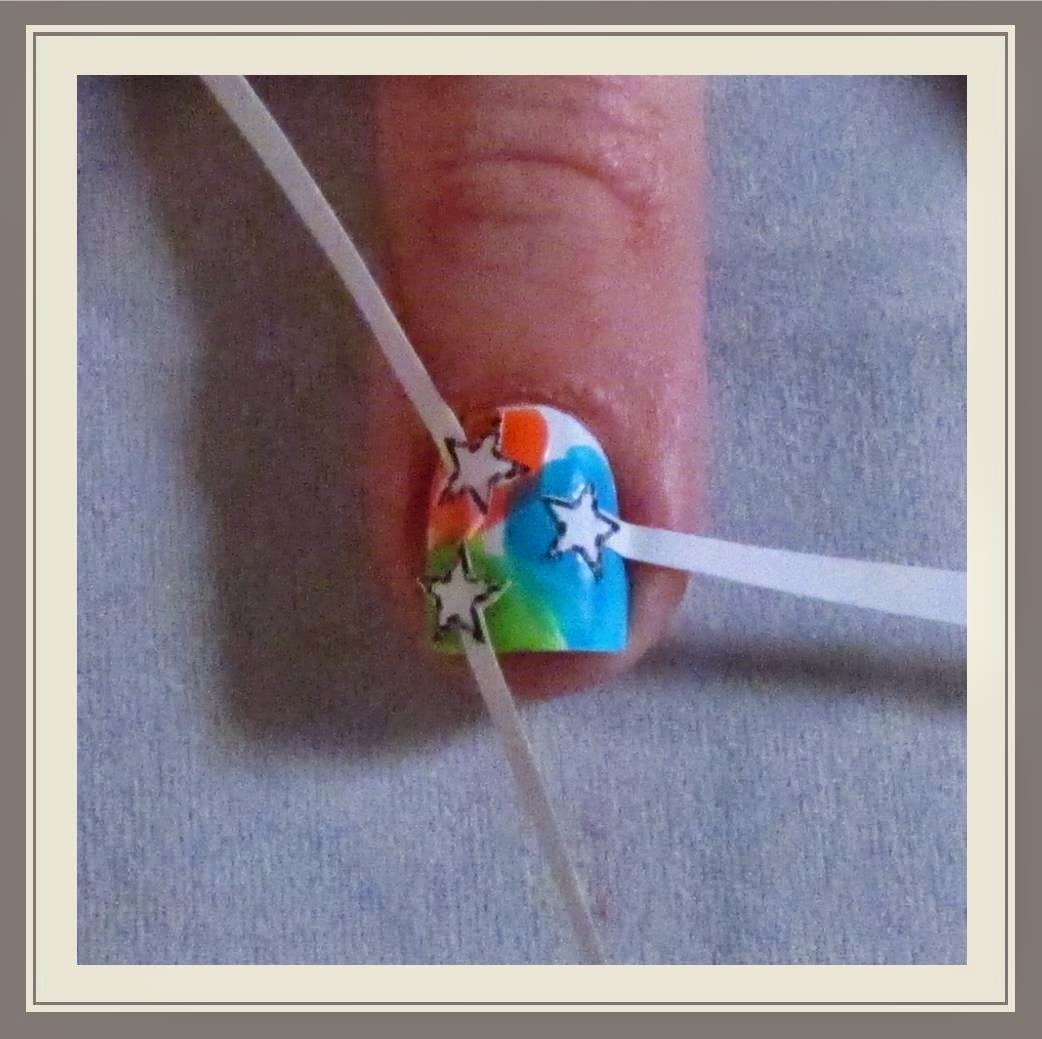
When it was completely dry I placed a medium sized star in the middle of my pointer nail. I then painted Chills & Thrills over the top. It is important to remove your vinyl before it dries too much. Because I was taking pictures I did not remove my vinyl quick enough so it pulled the paint a little when I did remove it.

When the vinyl is removed I used a small brush to fill in the area where the was tail to complete the star shape.

For the middle finger I used large sized stars placing them so they covered the corners. I again covered with a coat of Thrills & Chills then removed the vinyls.

For my ring finger I used three of my smallest stars and placed them over each color. I'd like to make a point that it is important that when using any kind of tape or vinyls make sure they are pressed down completely. One of my stars wasn't pressed all the way down so when I painted my coat of Thrills & Chills it got under the vinyl. When I pulled it up one of the arms of the star was messed up. I completed this nail by filling in the areas where the tails where to close in the star shapes.
I then performed a little clean up on the cuticles and added a top coat.

This project was fun though cutting out the really small stars was a bit tedious. I really like being able to print my own vinyls it really gives you never ending options. I hope you found this tutorial useful and inspires you to create your very own vinyls. See you next time.
Your Fellow Plebe,

