 Material
Base and top coat
Base color polish
Stamping color polish (you can purchase stamping polish but almost any polish will work)
Image plate ( I used Konad M61)
Stamper
Scraper
Toothpick (optional)
The Application Process
After applying your base coat and base color give your polish a little time to dry.
 |
| I used Cole from Zoya's Awaken 2014 Spring Collection |
Dab some polish on your image plate. You don't need to use stamping polish but I do recommend using thicker polish. On one of my attempts the polish was to thin and I couldn't pick it up with the stamper. Also, keep in mind that some polishes may not give you a crisp clean design. I found that some of my polishes weren't as opaque as I thought and so the stamped images looked kind of dull.
 |
| A little dab'll do ya. |
Using a scraper, scrape the excess polish off the image plate. If you use too much polish you may have to scrape a couple of times. You really don't need much polish. I also recommend you work over a paper towel because this can get really messy.
 |
| Scrape to the edge, not into another image. This will save you some clean up. |
Using the stamper pick up the image. Press the stamper firmly over the image to transfer it from the plate to the stamper.
 |
| Pick up the image by pressing the stamper firmly over the painted image. |
With the image on the stamper, transfer it to your nail. It is best to start at the edge of the nail and roll your stamper over the nail from left to right or vice versa. If your not comfortable with rolling the stamper, you can also hold the stamper in place and roll you finger instead. I used both techniques and found both to be easy.
| Start on one side of the nail and roll it across to the other. |
When you are done be sure to clean your image plate and stamper before using it again.
 |
| Use a cotton swab and some acetone to clean your image plate. |
If you have a full nail image and you wish to use only a part of it you can do so pretty easily. Once, you have an image on your stamper you can use a toothpick to scrape away parts of the image that you don't want.
 |
| For a partial image use a toothpick to scrape away parts that you don't want. |
Tips, Tricks, Recommendations
Seems easy doesn't it, well hopefully you have had or will have a better stamping experience than I have. Here are a few tips, tricks, and recommendations I have to make your stamping experience an enjoyable one.
- If you are using a polish you've never used before to stamp with try it out on a practice nail or a piece of paper before applying it to your painted nail. This will allow you to see the opacity of the polish and how well the design will show up.
- Use heavy contrasting polishes for your base color and your stamping polish color. This really makes your image standout.
 |
| On my first stamping attempt I used a black polish I had never used before. It wasn't as black as I thought it was. |
 |
| On this attempt I tried a purple polish to stamp with only to realize that there wasn't enough contrast to see the stamp. |
- Make sure your stamping polish is thick enough so that the stamper will pick it up.
- Work quickly, this is not really a process that you can take your time with. I found that if I wasn't quick enough I couldn't pick up the image with the stamper. I would recommend staying away from quick drying polishes unless you have lots of practice with stamping.
- I found that it was easiest to transfer the image onto a slightly tacky painted nail. The first time I tried stamping I painted my nails a day in advanced and had used a top coat on the finish. The stamp wouldn't stick to the dry top coat and flaked before I was even finished stamping. The second attempt I also used a top coat and drying drops on the finish before trying to stamp. On the third attempt I painted my base color and waited until they were tacky. This seemed to work the best, however, you don't want your finish to be too wet otherwise you'll ruin your base color when stamping your image.
- I also had some issues with my cuticles getting in the way. I know that sounds weird. I have rigid deep cuticles this prevented me from getting a really clean stamped image close to my cuticles. I don't have a solution to this but it is something you should keep in mind.
 |
| On my pinky my cuticle got in the way and part of the image wouldn't transfer |
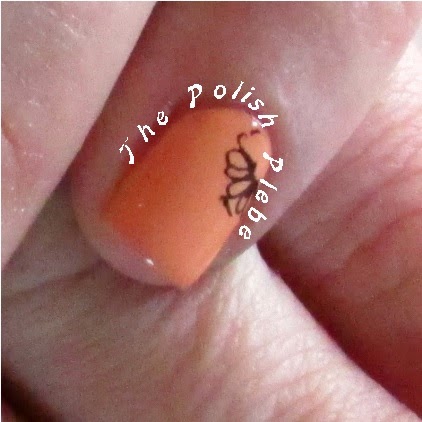
- Lastly, apply a top coat. This both gives the stamped image a shiny finish as well as helps seal the image.
 |
| Before topcoat (left) and after top coat (right). The top coat really adds a nice shine as well as makes the design look crisp. |

I would recommend that you start with a small image if you've never stamped before to get the hang of the technique before trying a full nail image. Unfortunately, I didn't take this advice myself (I'm one of those go big or go home type of people). I hope this helps you in your stamping endeavors. Have fun stamping your way into spring!
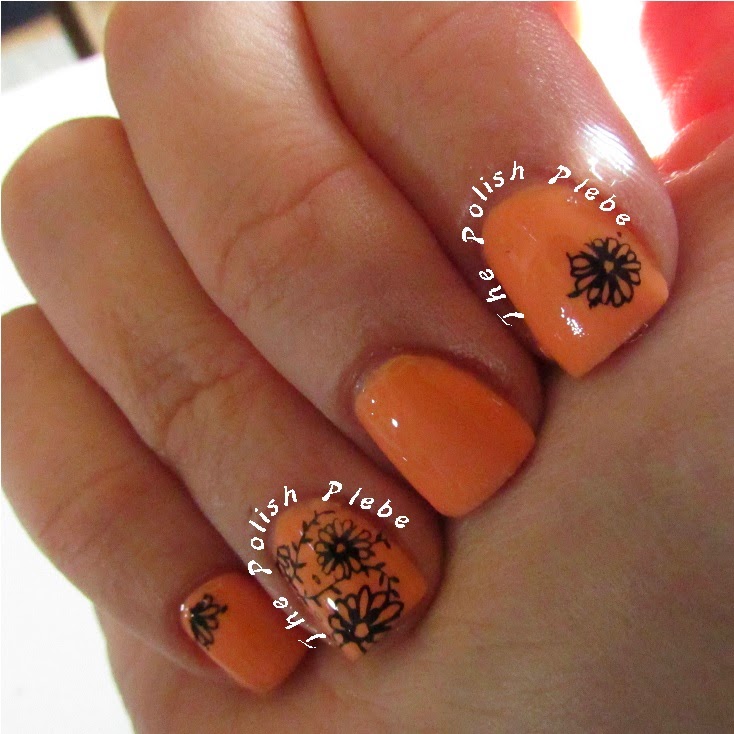
Your Fellow Plebe,
