Hi Guys! Happy Valentine's Day! (I know it’s a couple days early.) I have for you today a Valentine's Day mani that is sure to break some hearts. I'm using simple techniques that I'm sure you've seen before but with my own little twist. Here are the materials you'll need:
Materials:

Base Color (Matte color or Mattifying Top Coat if you are going for this exact look.)
1 ‐ 2 Accent Colors
Scotch and/or Painter's Tape
Scissors (regular and zigzag if you have them.)
Dotting Tools
Toothpick (recommended to make things a little easier.)
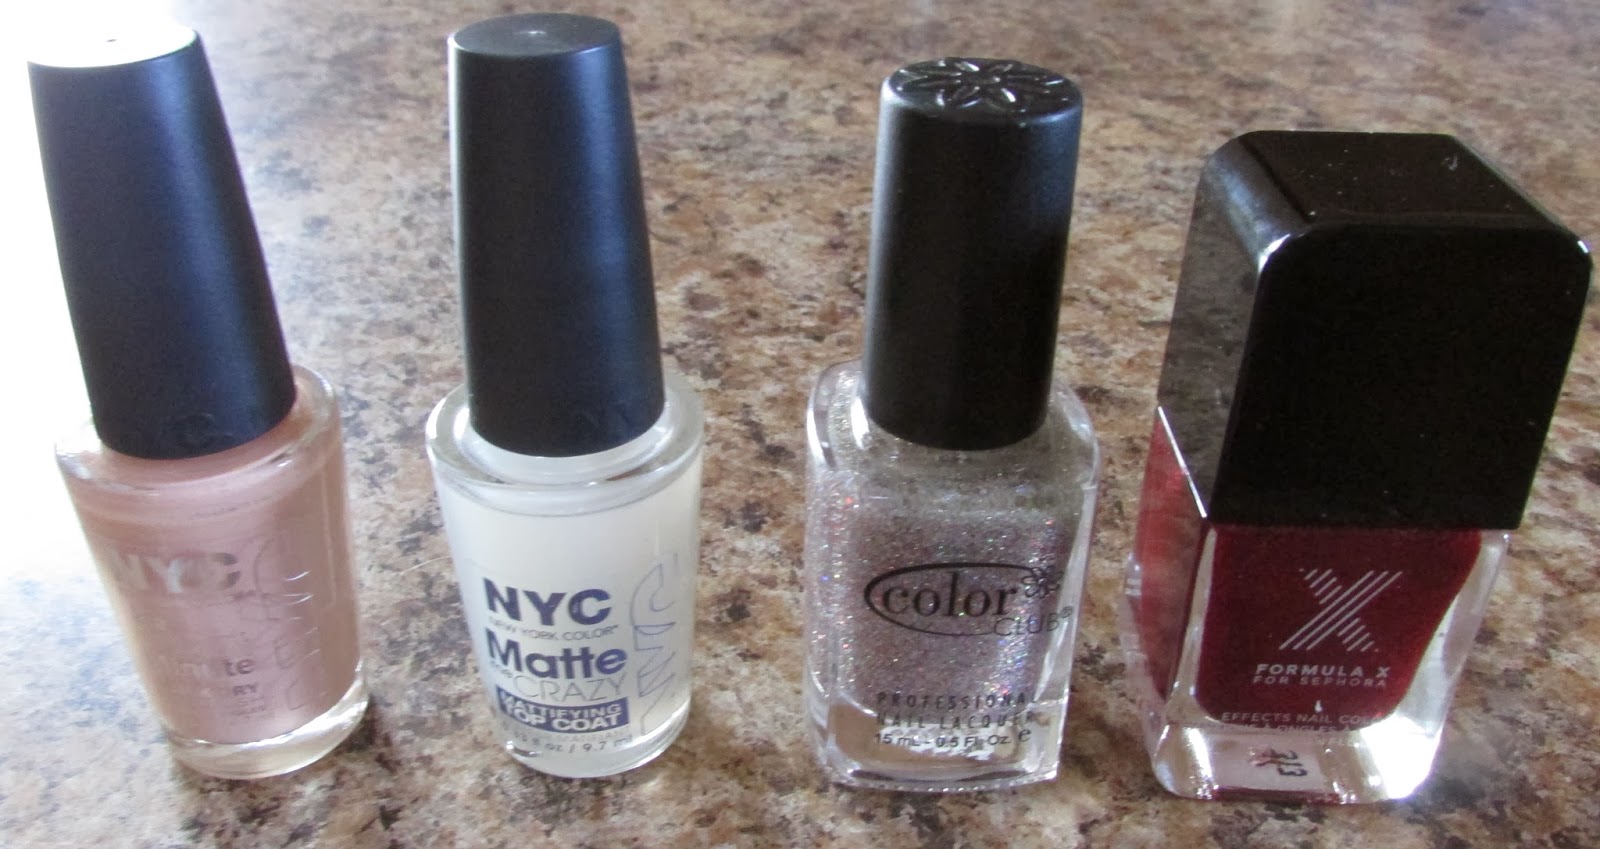
For this design, I used New York Color ‐ #201 Fashion Safari on all my fingers except for my pinky fingers. I also applied a New York Color mattifying top coat ‐ #274 Matte Me Crazy to all fingers except my pinkies. For my pinkies and other accents I used Sephora's Formula X ‐ Atom + Eve. This is a very pretty micro‐glitter that has a red base, so it only took me two coats to get the desired affect. As a second accent color, I used Color Club ‐#843 Magic Attraction, another micro‐glitter that applied easily in two coats.
You don't have to use a matte color or top coat for your design that is entirely up to you. I used a matte top coat for a few reasons, 1) I've never used a matte color or coat before, 2) I wanted my fingers to appear nude, and 3) I wanted my accents to really stand out.
 |
| Base color with matte top coat |
The problem that I had, which this is a common problem for me, is that I am very impatient. I ended up redoing my base coat three times before I finally had one that was nice enough to use. It is important that whenever you are using tape for your designs that you allow the base color to dry completely. I was running into a problem because the layers, two coats of color + the matte top coat, were not drying all that quickly. What I ended up doing on the third time around was applying a quick drying top coat and used drying drops on my base color. Once, the finish was dry to the touch (roughly 5 minutes) I then applied my matte top coat. For some reason this did work out really well for me and it didn't change the affect of the matte coat. However, I waited almost a full day before doing the accents because I didn't want to risk ruining
my base color with the tape.
For this mani, I used two accent colors. Starting with the thumb, I did the heart scotch tape cutout that you've probably seen a thousand times. I wanted to try this for myself to see if it was as easy as everyone makes it seem. It was relatively easy but here are a few pointers for you.
 |
| It looks like I need to go back to grade school and learn how to cut out a heart. |
• Remove some of the stickiness of the tape first by sticking it to your hand or folding it and unfolding it a few times. This will make it easier to peal apart after you've made your cutout and help prevent it from pealing the base color off your nail.
+(2).jpg) |
| Skew the overlap, it makes it easier to open |
• When you fold your tape in half do not overlap it evenly, skew it enough so that you can grab hold of it and pull the halves apart.
• In some tutorials I have seen people anchor the tape on their thumb so that it is easier to pull apart. I tried this and found it difficult to maneuver the tape to get the cutout I wanted. If you want to do this instead of skewing the overlap of the tape, tape it to a pen or pencil instead of your finger. This gives you both hands to maneuver with.
 |
| Use a pen instead of your thumb to give yourself more manuevering ability. |
• The size of your cutout is up to you, of course, but if you are like me and bad at eyeballing the size, draw an outline before cutting. This may save you some time and some tape.
• When you apply your scotch tape template make sure all the edges of the cutout are pressed down. Use a nail buffer to smooth the edges and ensure that it is pressed down firmly.
• After applying the accent color, apply a quick drying top coat. In this case because I used a matte finish on my base color I applied the quick drying top coat before I removed the tape. This is not necessary but it helps speed up the drying time on your accent. If you are not using a matte finish, remove the tape
and apply the top coat to the entire nail to seal the design.
• Give the polish only a couple seconds to dry time before pealing the tape off. If you peal it too soon the polish may run and ruin your design. If you wait too long to peal the tape, you may end up pealing the accent off too.
 |
| Broken Heart |
For my mid‐finger, I did what I am calling my broken heart design. Using painter's tape and a pair of zigzag scissors, I cut a V‐shape. I had to use painter's tape because my zigzag scissors were not sharp enough to cut the scotch tape cleanly (very frustrating). This is where the toothpick comes in handy. To get a nice V‐shape I fold the tape in half around the toothpick and then cut a shallow V in the tape with the zigzag scissors. Using the toothpick makes it easier to open or pull apart the halves of the V. If you don't have zigzag scissors you could always use regular scissors and cut a jagged Vshape. I then applied the point of the V center on the tip of my mid‐finger, pressing the edges down as I did with the heart tape cutout. Using my red accent color I painted the sides of the nail and finished with a quick drying top coat before removing
my tape.
 |
| Folding the tape around the toothpick gives you a handle to make it easier to hold the tape and make it easier to open it |
On my pointer and ring fingers, I decided that I want them to be a little simpler but still interesting. So, I taped off the tips and added a glittered french tip using a simpler micro‐glitter. Then using dotting tools I added random dots and a couple freehand hearts. The hearts were easier than I expected but they are not all that easy to see in the glitter. I plan on doing a little mini tutorial on making hearts using dotting tools. I really like this mani because the red really stands out and is complimented by the nude and the lighter glitter. It was easy to do but requires some patients. I recommend you paint your base color a day before if you have the time. This will keep you from getting too frustrated and having to redo your base color multiple times. I hope you enjoyed this tutorial. Happy Valentine's Day! Don't break too many hearts this weekend.

Your Fellow Plebe,
