Showing posts with label Valentine's Day Nail Art.. Show all posts

Hugs and Kisses Gradient

This week's NPQ challenge is gradient design in honor of our gradient Queen +Sarah Short .  I decided to try a little experiment involving vinyls and liquid latex to create this nail art design...


I started with a nice clean white base coat of Color Club 'On Cloud Nine,' (from the Love Tahiry collection).

For my thumb I did a simple two tone gradient, sponged in three coats.  I used liquid latex on my cuticles to speed up the clean up process.  I used Color Club 'Je T'Aime,' (from the Paris in Love collection,) and 'The Islands' (from the Ticket to Paradise collection).
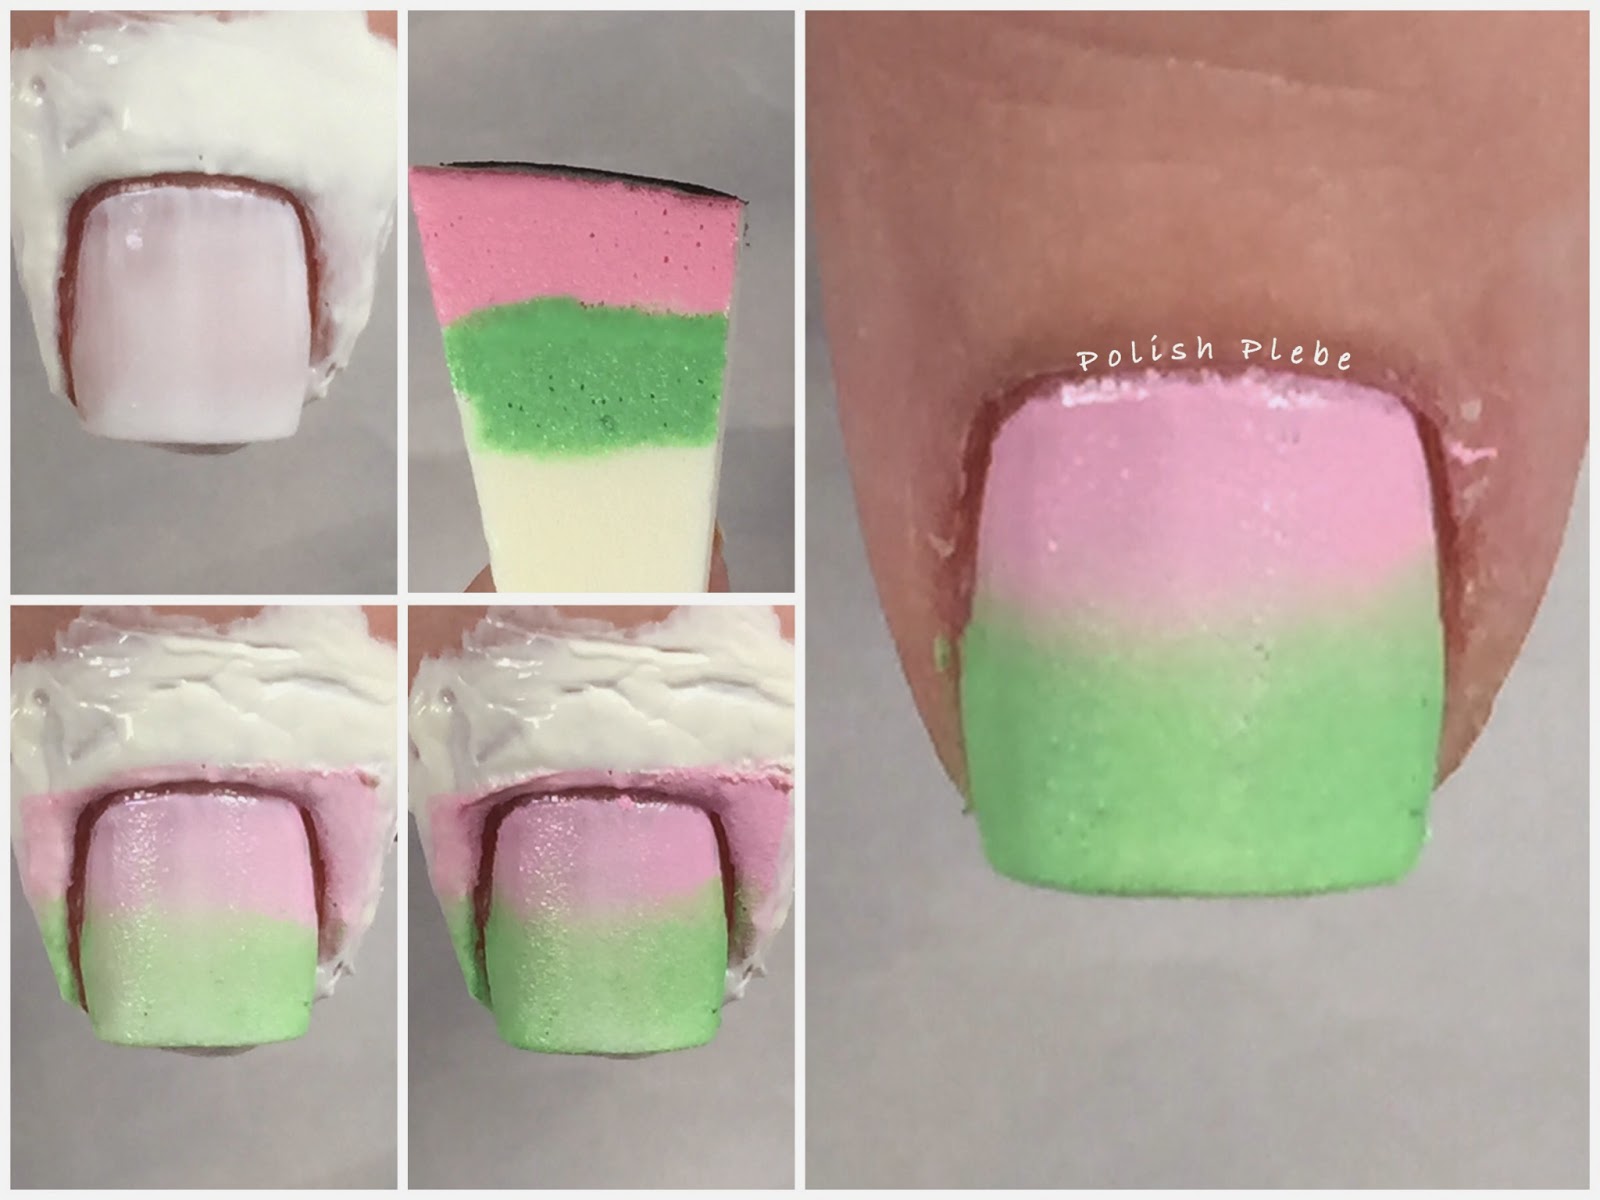
 
 
To create the X's for hugs, I created the outline using single chevron vinyls from nailvinyls.com.  Then I covered up my cuticle and the areas I didn't want color on with liquid latex.  I then sponged my colors over the X.  Be sure that you let the liquid latex dry completely when using it.  I didn't and I made a mess, luckily I was able to salvage the design without starting over.  I also reversed the colors so the green was on top and the pink was on the bottom.  My X lost a little of its shape when I removed the vinyls and latex, so I went back over with white polish and a small brush to fix it.
 
 
For the O's, aka kisses, I used binder reinforcement circles (these can be found in any office supply store or department).  I covered the exposed area I didn't want color on with liquid latex.  I then repeated the sponging process over the open center of the circle.  After removing the reinforcement circle and the latex, I used a small dotting tool and white polish to dot the center of the O.
 
 
I repeated the X and O on my ring and pinky fingers, performed some clean up and applied a shiny quick drying top coat.
 
 
This was fun, though a little more time consuming than I had expected.  I hope you enjoyed this nail art design.  Thanks for stopping by, see you next time.
 
Your Fellow Plebe,


Jelly Sandwich Hearts

I have been wanting to try this technique out for a while and I thought what better theme than Valentine's Day to create a jelly sandwich design.  You know because love is a layered thing, so I did a basic layered heart design.


To create this look start with a semi-translucent or sheer polish.  I've seen these type of nail art designs done with OPI Sheer Tints or Smokey top coats.  I don't own any sheer tints and I wanted something bright so I opted to use a pink glitter topper I have,  Sinful Colors 'Glass Pink'.  Start out with one thin coat of your sheer polish.


Then draw or stamp a design of your choice.  I decided to go with simple hearts for Valentine's Day.  For those of you who do not have experience drawing hearts, here is a simple way of drawing them.  Start with a small or medium size dotting tool and place two dots next to each other.  Then with a striping or thin brush draw a V-shape from the outside of the dots creating the hearts point.  Then simply fill in the center.


For this design I drew multiple hearts in three different shades, Color Club 'Red-Handed,' ' Sweet Getaway,' and 'On Cloud Nine.'


Once, you are satisfied with your first layer of hearts (or whatever pattern/design you are creating) add another layer of your sheer tint.


Add another layer of your pattern, in this case hearts.  You may end up overlapping them a bit at this point.


Add another layer of sheer tint.


I finished with one more layer of hearts and a clear top coat.  By this layer it is nearly impossible not to overlap the design.


I stopped here because I felt anymore layers would start to messy and be to thick.  Keep in mind the more layers you create the longer it will take to dry and the thicker it will be.  Thicker nail art does not last as long and is more likely to chip.

 
One of the great benefits to a nail art design using this jelly sandwich technique is that it allows you to practice a basic shape or pattern repeatedly.  With each layer the lower layers become more opaque so your early mistakes get hard to see.  Not to mention it creates a really interesting look.
 
 
I hope you enjoyed this nail art, and give it a try yourself.  Thanks for stopping by, see you next time.
 
 
Your Fellow Plebe,


Calligraphy "Love" Nail Art

About a week (maybe two) ago, I was scrolling through Instagram when I saw a post from one of my favorite Instagram gals, @sloteazzy.  She was using a calligraphy pen to create a nail art design.  My first reaction was, face palm!  Why didn't I think of that?!

I have been interested in calligraphy for a long time.  I think I got my first calligraphy set when I was thirteen or so.  Though I don't write in calligraphy all the time, I do scribe an occasional letter now and then.  I think it is kind of fun to write letters and send them snail mail every once and a while.  I like it even more when I get a response the same way.

Anyways, I broke out my calligraphy pen and some ink and tried it out.  Since, this was a trial run I didn't want to create anything to elaborate, so this is what I did...


I started off with Color Club 'On Cloud Nine' from the Love Tahiry collection (swatches of this collection coming soon), and topped this off with Nicole by OPI Matte top coat.  I thought the matte finish would help catch the ink better.


Since, it has been a bit and because I wasn't sure exactly which tip I wanted to use, I practiced scrolling some letters on paper before I started out on my nails.  I ended up using the smallest tip I own, though the medium tip would have worked well too.


I then carefully scribed the letter L. O. V. E. on each nail.  It worked much better then I had anticipated.


I didn't want to leave my thumb bare so I went a head and drew a heart with the calligraphy pen and used a red nail art striper to fill it in.


A couple pointers if you are going to try this out:

  • If you have never used a calligraphy pen before, I strongly recommend you practice on paper first.  Unlike a ball point pen you have to practice to determine the best hold and pressure as well as determining which style text you prefer.
  • If you have curved nails like mine (baseball shaped, curved both horizontally and vertically), you may have to adjust your grip slightly.
  • Some ink may be a bit runny, if that is the case try to use a little ink at a time and don't apply too much pressure.  You may also have to go over the same area twice, I did in a couple of spots.
  • Use a matte top coat or a slightly textured polish to help capture the ink.  Stay away from high gloss or very  smooth finish because the ink will roll or run off.
  • One of the most forgiving things about the ink that I used was that it washed off easily.  In, fact I was having trouble with my E, and had to start over three times before I finally got it right.
  • Also this ink does take a bit of time to dry, so if you intend to use a top coat give it a few minutes before application.
 I liked the way this looked with the matte finish and wasn't going to use a top coat, but then I thought what the heck.  I need to see how the ink was going to react with the top coat anyways.  So, here it is with Seche Vite quick drying top coat...


I am super excited that this little experiment worked out, I think it has a real romantic feel to it.  Now I need to practice writing smaller, try different colored inks, and practice using my none dominant hand.  So, I'm pretty sure you will be seeing more nail art designs from me in the future using a calligraphy pen.  I hope you enjoyed this nail art design, and found the tips useful.  Thanks for stopping by, see you next time.


Your Fellow Plebe,


Nails Art Proudly Powered by Blogger